d3 line chart tutorial
Associated Articles: d3 line chart tutorial
Introduction
With nice pleasure, we are going to discover the intriguing matter associated to d3 line chart tutorial. Let’s weave fascinating info and provide contemporary views to the readers.
Desk of Content material
Mastering D3.js: A Complete Line Chart Tutorial
D3.js (Information-Pushed Paperwork) is a strong JavaScript library for manipulating the Doc Object Mannequin (DOM) based mostly on information. It is a go-to selection for creating interactive and visually interesting information visualizations, and line charts are a basic factor inside its capabilities. This tutorial will information you thru making a complete D3.js line chart, masking every thing from establishing the surroundings to including interactive parts. We’ll construct upon a primary line chart, progressively incorporating superior options to reveal the flexibility of D3.
Half 1: Setting the Stage – Mission Setup and Fundamental Construction
Earlier than diving into the code, we have to arrange our improvement surroundings. You may want a primary understanding of HTML, CSS, and JavaScript. We’ll use a easy HTML file to construction our chart, CSS for styling, and D3.js for the visualization logic.
- Embrace D3.js: Step one is to incorporate the D3.js library in your HTML file. You’ll be able to both obtain the library and hyperlink to it domestically or use a CDN. The CDN strategy is usually most well-liked for its simplicity:
<!DOCTYPE html>
<html>
<head>
<meta charset="utf-8">
<title>D3.js Line Chart</title>
<type>
  physique  margin: 0;
  .chart
    background-color: #f0f0f0;
    width: 800px;
    peak: 500px;

</type>
</head>
<physique>
<div class="chart"></div>
<script src="https://d3js.org/d3.v7.min.js"></script>
<script src="script.js"></script> </physique>
</html>
We have created a div with the category "chart" which can function the container for our chart. We have additionally included the D3.js library by way of a CDN and a script.js file the place we’ll write our D3 code.
- Information Preparation: D3.js works with information. Let’s outline a easy dataset for our line chart:
// script.js
const information = [
   date: new Date(2024, 0, 1), value: 10 ,
   date: new Date(2024, 0, 8), value: 15 ,
   date: new Date(2024, 0, 15), value: 22 ,
   date: new Date(2024, 0, 22), value: 18 ,
   date: new Date(2024, 0, 29), value: 25 ,
   date: new Date(2024, 1, 5), value: 20
];
This information represents values over time. We’ll use the date property for the x-axis and the worth property for the y-axis.
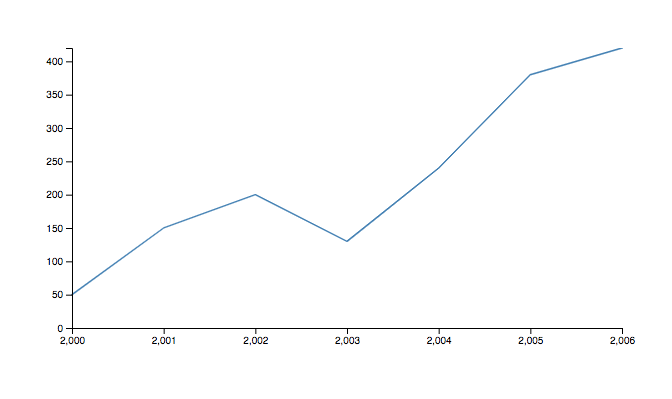
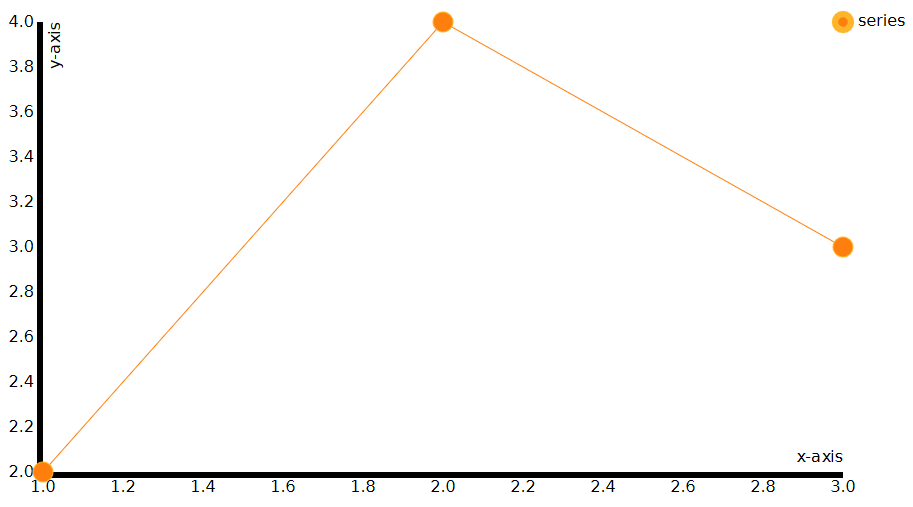
Half 2: Constructing the Fundamental Line Chart
Now let’s create the essential line chart utilizing D3.js. We’ll use scales to map information to visible coordinates and an axis generator to create the axes.
const margin =  prime: 20, proper: 20, backside: 30, left: 50 ;
const width = 800 - margin.left - margin.proper;
const peak = 500 - margin.prime - margin.backside;

const svg = d3.choose(".chart")
  .append("svg")
  .attr("width", width + margin.left + margin.proper)
  .attr("peak", peak + margin.prime + margin.backside)
  .append("g")
  .attr("rework", `translate($margin.left,$margin.prime)`);

const xScale = d3.scaleTime()
  .area(d3.extent(information, d => d.date))
  .vary([0, width]);

const yScale = d3.scaleLinear()
  .area([0, d3.max(data, d => d.value)])
  .vary([height, 0]);

const xAxis = d3.axisBottom(xScale);
const yAxis = d3.axisLeft(yScale);

svg.append("g")
  .attr("rework", `translate(0,$peak)`)
  .name(xAxis);

svg.append("g")
  .name(yAxis);

const line = d3.line()
  .x(d => xScale(d.date))
  .y(d => yScale(d.worth));

svg.append("path")
  .datum(information)
  .attr("fill", "none")
  .attr("stroke", "steelblue")
  .attr("stroke-width", 2)
  .attr("d", line);
This code creates an SVG factor, defines scales for the x and y axes, provides axes to the chart, and eventually, attracts the road utilizing the d3.line generator. The datum operate passes the whole information array to the road generator.
Half 3: Enhancing the Chart – Tooltips and Interactivity
Let’s add interactivity to our chart utilizing tooltips to show information factors on hover.
const tooltip = d3.choose("physique").append("div")
  .attr("class", "tooltip")
  .type("opacity", 0);

svg.selectAll("circle")
  .information(information)
  .enter()
  .append("circle")
  .attr("cx", d => xScale(d.date))
  .attr("cy", d => yScale(d.worth))
  .attr("r", 5)
  .attr("fill", "steelblue")
  .on("mouseover", operate(occasion, d)
    tooltip.transition()
      .length(200)
      .type("opacity", .9);
    tooltip.html(`Date: $d.date.toLocaleDateString()<br>Worth: $d.worth`)
      .type("left", (occasion.pageX + 10) + "px")
      .type("prime", (occasion.pageY - 28) + "px");
  )
  .on("mouseout", operate(d)
    tooltip.transition()
      .length(500)
      .type("opacity", 0);
  );
This code provides circles representing information factors and makes use of on("mouseover") and on("mouseout") to point out and conceal a tooltip containing the date and worth of the hovered level. Bear in mind so as to add CSS for the tooltip:
.tooltip
  place: absolute;
  text-align: heart;
  width: 120px;
  peak: auto;
  padding: 10px;
  background-color: white;
  border: 1px stable #ccc;
  border-radius: 5px;
  pointer-events: none;
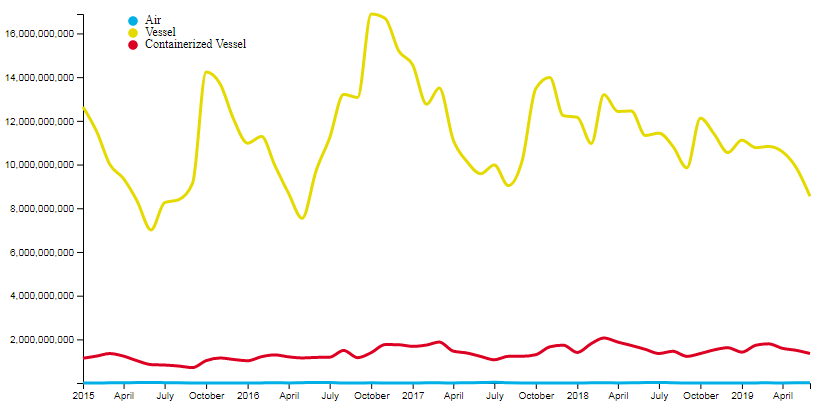
Half 4: Superior Options – A number of Traces and Legends
Let’s lengthen our chart to deal with a number of datasets and add a legend. Suppose we now have one other dataset:
const data2 = [
   date: new Date(2024, 0, 1), value: 12 ,
   date: new Date(2024, 0, 8), value: 18 ,
   date: new Date(2024, 0, 15), value: 25 ,
   date: new Date(2024, 0, 22), value: 20 ,
   date: new Date(2024, 0, 29), value: 30 ,
   date: new Date(2024, 1, 5), value: 25
];
We are able to modify our code to deal with each datasets:
const datasets = [
   name: 'Dataset 1', data: data, color: 'steelblue' ,
   name: 'Dataset 2', data: data2, color: 'orange'
];

const strains = svg.selectAll(".line")
  .information(datasets)
  .enter()
  .append("path")
  .attr("class", "line")
  .attr("fill", "none")
  .attr("stroke", d => d.colour)
  .attr("stroke-width", 2)
  .attr("d", d => d3.line()
    .x(d1 => xScale(d1.date))
    .y(d1 => yScale(d1.worth))(d.information));

const legend = svg.append("g")
  .attr("rework", `translate($width - 100, 20)`);

legend.selectAll(".legend-item")
  .information(datasets)
  .enter()
  .append("g")
  .attr("class", "legend-item")
  .attr("rework", (d, i) => `translate(0, $i * 20)`)
  .every(operate(d)
    d3.choose(this).append("rect")
      .attr("width", 10)
      .attr("peak", 10)
      .attr("fill", d.colour);
    d3.choose(this).append("textual content")
      .attr("x", 15)
      .attr("y", 10)
      .textual content(d.title);
  );
This code iterates by way of the datasets, making a line for every. A legend is added to obviously determine every line. Bear in mind to regulate the CSS to accommodate the legend.
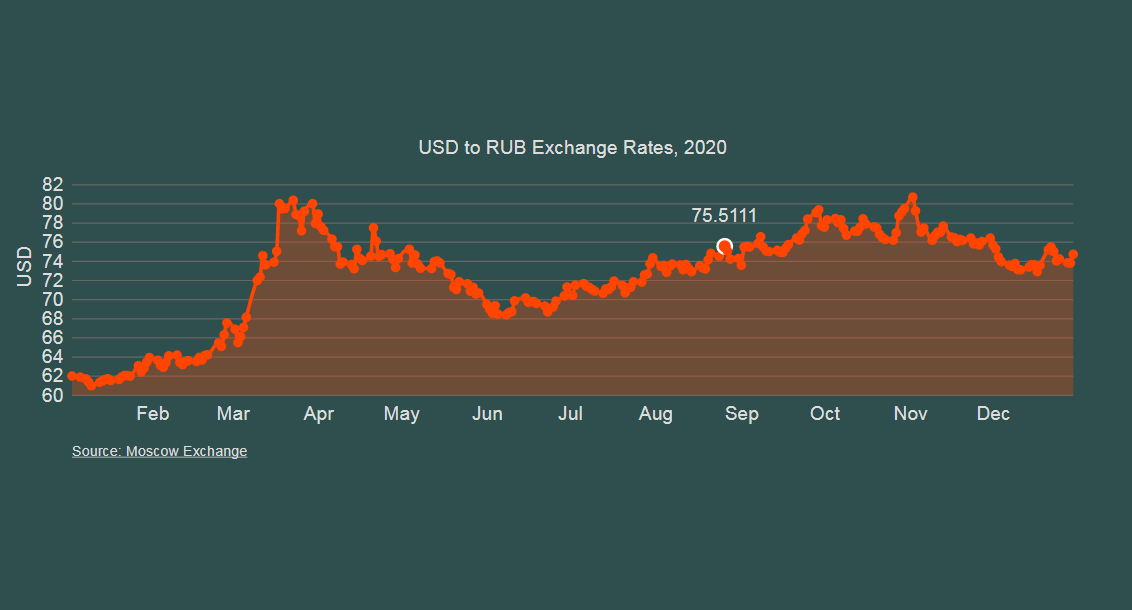
Half 5: Additional Enhancements and Customization
This tutorial gives a stable basis for creating D3.js line charts. Nevertheless, there are lots of avenues for additional customization and enhancement:
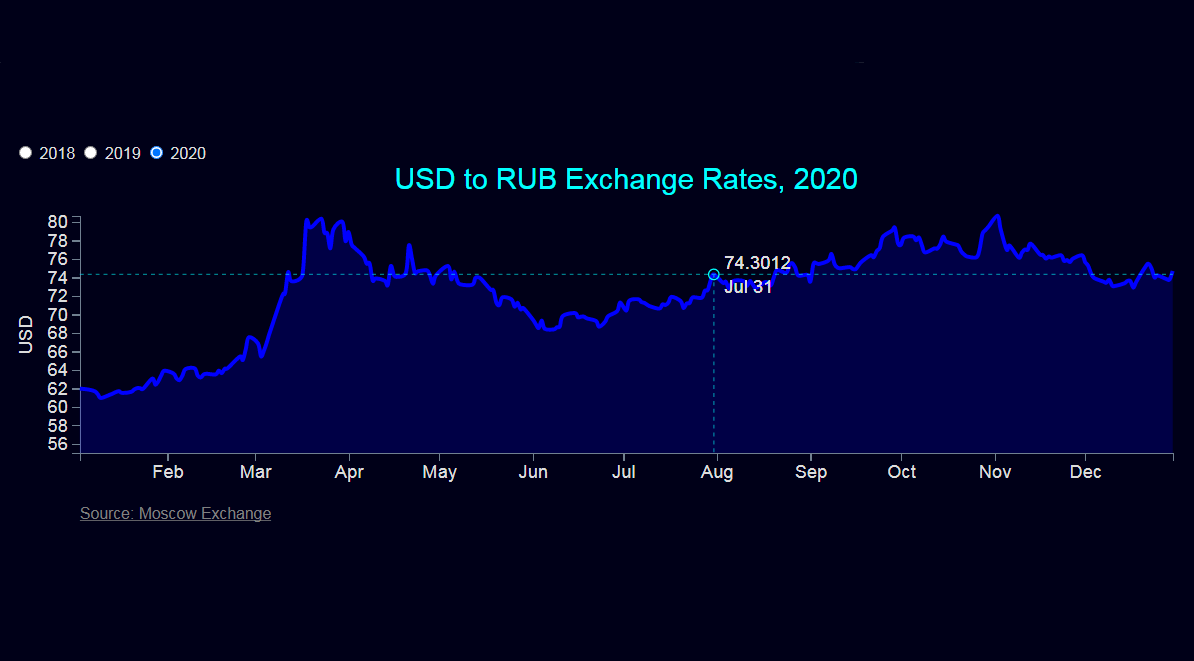
- Interactive Zooming and Panning: D3.js gives built-in capabilities for zooming and panning, permitting customers to discover the information in additional element.
- Customized Axis Formatting: You’ll be able to customise the formatting of the axis labels to show dates, numbers, or different models in a selected format.
- Including Annotations: Spotlight particular information factors or areas of curiosity by including annotations to the chart.
- Dynamic Information Updates: Fetch information from an exterior supply (e.g., an API) and replace the chart dynamically.
- Responsive Design: Make your chart conscious of totally different display sizes.
- Superior Transitions and Animations: Use D3’s transition capabilities to create easy animations for information updates and interactions.
- Themes and Styling: Discover totally different colour palettes and styling choices to create visually interesting charts that align along with your branding.
By mastering these methods and exploring D3.js’s intensive documentation, you may create refined and fascinating information visualizations that successfully talk insights out of your information. Bear in mind to experiment, adapt the code to your particular wants, and discover the huge potential of D3.js for information visualization. This tutorial gives a stable basis, however steady studying and follow are key to turning into proficient with this highly effective library. The official D3.js documentation and quite a few on-line sources provide invaluable help to your journey in mastering information visualization with D3.js.

Closure
Thus, we hope this text has supplied precious insights into d3 line chart tutorial. We thanks for taking the time to learn this text. See you in our subsequent article!