Mastering Bar Charts in Python: A Complete Information
Associated Articles: Mastering Bar Charts in Python: A Complete Information
Introduction
On this auspicious event, we’re delighted to delve into the intriguing subject associated to Mastering Bar Charts in Python: A Complete Information. Let’s weave attention-grabbing data and supply recent views to the readers.
Desk of Content material
Mastering Bar Charts in Python: A Complete Information

Bar charts, a staple of information visualization, supply a transparent and efficient strategy to examine categorical information. Their simplicity belies their energy; they will reveal tendencies, spotlight outliers, and facilitate insightful comparisons throughout completely different teams. Python, with its wealthy ecosystem of information science libraries, gives a number of avenues for creating compelling and informative bar charts. This text delves deep into the method, protecting varied libraries, customization choices, and finest practices for producing impactful bar charts.
1. The Basis: Matplotlib’s bar() Perform
Matplotlib, a basic plotting library in Python, gives the bar() perform because the cornerstone for creating bar charts. Its easy syntax makes it accessible to rookies, whereas its intensive customization choices cater to skilled customers.
import matplotlib.pyplot as plt
classes = ['A', 'B', 'C', 'D']
values = [25, 40, 15, 30]
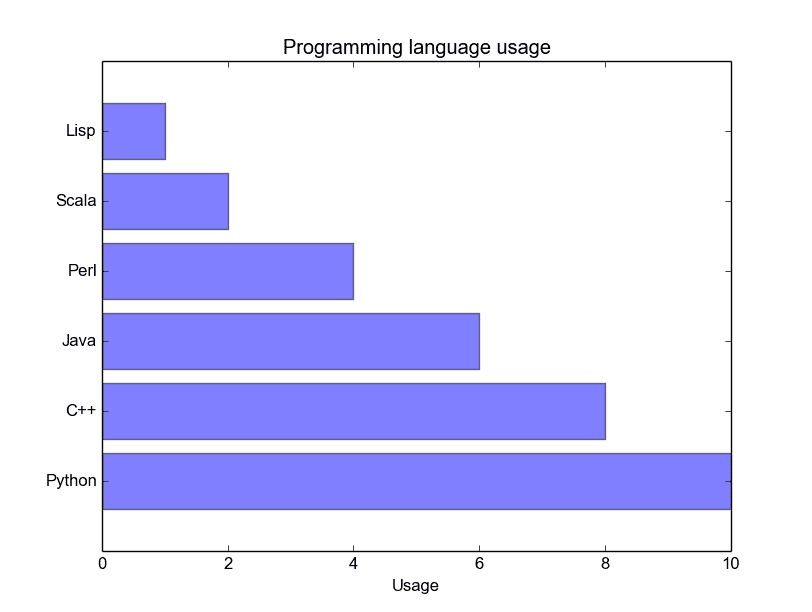
plt.bar(classes, values)
plt.xlabel("Classes")
plt.ylabel("Values")
plt.title("Easy Bar Chart")
plt.present()This straightforward code generates a fundamental bar chart. classes gives the labels for the x-axis, and values represents the peak of every bar. xlabel, ylabel, and title capabilities add descriptive labels to reinforce readability. plt.present() shows the chart.
2. Enhancing Visible Attraction and Info Density
Matplotlib’s bar() perform gives quite a few parameters for personalisation:
-
coloration: Specify the colour of the bars utilizing a single coloration string (e.g., ‘purple’, ‘blue’), a listing of colours for a number of bars, or a colormap. -
width: Alter the width of the bars. -
edgecolor: Set the colour of the bar outlines. -
linewidth: Management the thickness of the bar outlines. -
alpha: Alter the transparency of the bars (0.0 is totally clear, 1.0 is totally opaque). -
error_kw: Add error bars to signify uncertainty within the information. That is essential for showcasing statistical significance. -
yerr: Particularly defines the error bar lengths.
import matplotlib.pyplot as plt
import numpy as np

classes = ['A', 'B', 'C', 'D']
values = [25, 40, 15, 30]
errors = [2, 5, 3, 4]

plt.bar(classes, values, coloration=['red', 'blue', 'green', 'orange'], width=0.5, edgecolor='black', linewidth=1.5, yerr=errors, error_kw='capsize': 5)
plt.xlabel("Classes")
plt.ylabel("Values")
plt.title("Personalized Bar Chart with Error Bars")
plt.present()
This instance demonstrates the usage of a number of coloration, width adjustment, error bars, and capsize for a extra informative and visually interesting chart.
3. Dealing with A number of Datasets: Grouped and Stacked Bar Charts
Usually, you will want to check a number of datasets throughout the similar classes. Matplotlib facilitates this with grouped and stacked bar charts.
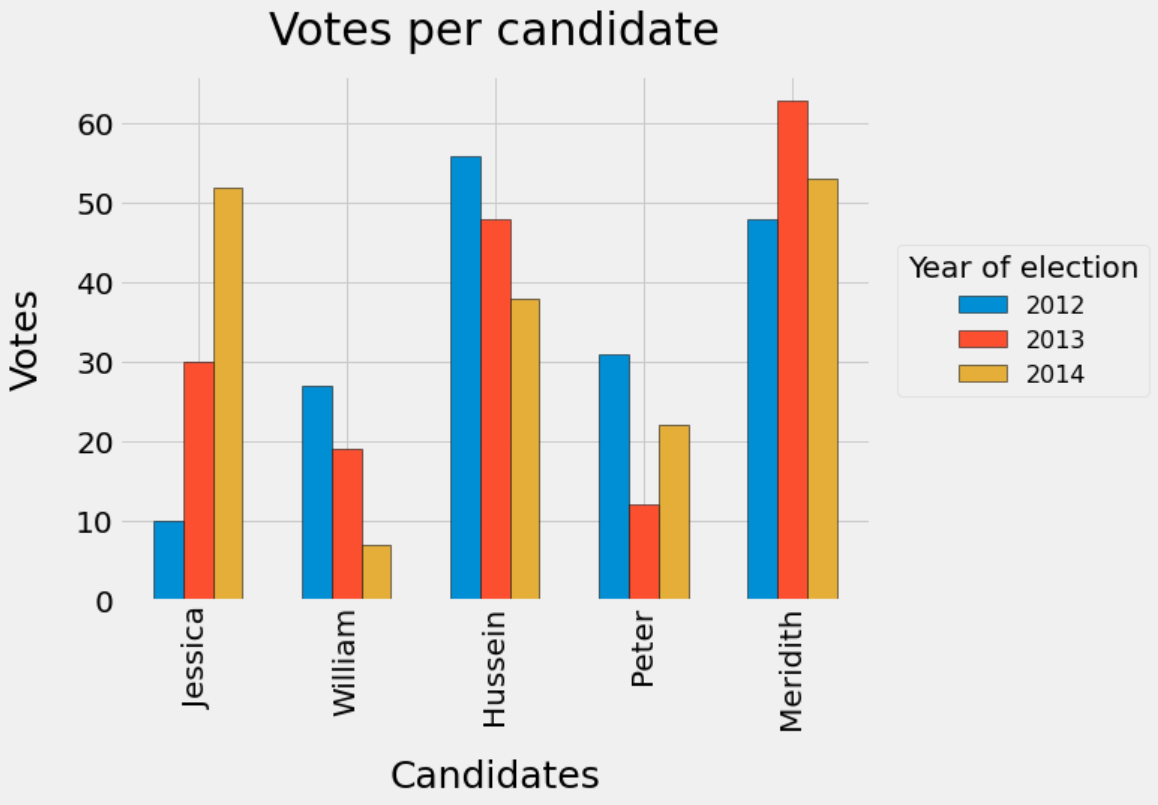
Grouped Bar Charts: These show a number of bars side-by-side for every class, permitting for direct comparability between datasets.
import matplotlib.pyplot as plt
import numpy as np

classes = ['A', 'B', 'C', 'D']
dataset1 = [25, 40, 15, 30]
dataset2 = [18, 32, 22, 25]
width = 0.35

x = np.arange(len(classes))

plt.bar(x - width/2, dataset1, width, label='Dataset 1')
plt.bar(x + width/2, dataset2, width, label='Dataset 2')
plt.xticks(x, classes)
plt.xlabel("Classes")
plt.ylabel("Values")
plt.title("Grouped Bar Chart")
plt.legend()
plt.present()
Right here, we use np.arange to create x-axis positions and offset the bars utilizing width/2 for clear separation. plt.legend() provides a legend for straightforward identification.
Stacked Bar Charts: These show bars stacked on prime of one another for every class, displaying the contribution of every dataset to the overall worth.
import matplotlib.pyplot as plt
import numpy as np

classes = ['A', 'B', 'C', 'D']
dataset1 = [25, 40, 15, 30]
dataset2 = [18, 32, 22, 25]

plt.bar(classes, dataset1, label='Dataset 1')
plt.bar(classes, dataset2, backside=dataset1, label='Dataset 2')
plt.xlabel("Classes")
plt.ylabel("Values")
plt.title("Stacked Bar Chart")
plt.legend()
plt.present()
backside parameter within the second plt.bar name stacks dataset2 on prime of dataset1.
4. Leveraging Seaborn for Enhanced Aesthetics and Performance
Seaborn, constructed on prime of Matplotlib, simplifies the creation of statistically informative and visually interesting bar charts. Its high-level capabilities deal with most of the particulars mechanically, leading to cleaner and extra refined plots.
import seaborn as sns
import matplotlib.pyplot as plt
import pandas as pd

information = 'Class': ['A', 'B', 'C', 'D', 'A', 'B', 'C', 'D'],
        'Dataset': ['Dataset 1', 'Dataset 1', 'Dataset 1', 'Dataset 1', 'Dataset 2', 'Dataset 2', 'Dataset 2', 'Dataset 2'],
        'Worth': [25, 40, 15, 30, 18, 32, 22, 25]
df = pd.DataFrame(information)

sns.barplot(x='Class', y='Worth', hue='Dataset', information=df)
plt.xlabel("Classes")
plt.ylabel("Values")
plt.title("Seaborn Bar Chart")
plt.present()
Seaborn mechanically handles error bars and legends, making the code extra concise and the chart extra visually interesting. It additionally gives choices for varied statistical estimations (e.g., imply, median) throughout the bars.
5. Superior Customization with Seaborn and Matplotlib
Each Matplotlib and Seaborn supply intensive customization choices past the fundamentals. These embrace:
- Altering coloration palettes: Seaborn gives quite a few built-in palettes, whereas Matplotlib permits for extra granular management over colours.
- Including annotations: Label particular person bars with their values or different related data.
- Modifying axis limits and ticks: Customise the vary and spacing of axis labels.
- Utilizing completely different types: Seaborn gives varied types to change the general look of the chart.
-
Saving the chart: Export the chart in varied codecs (e.g., PNG, SVG, PDF) utilizing
plt.savefig().
6. Selecting the Proper Library and Strategy
The selection between Matplotlib and Seaborn is determined by your wants:
- Matplotlib: Provides most management and suppleness, excellent for advanced customizations and fine-grained changes. Appropriate for customers who want exact management over each facet of the chart.
- Seaborn: Supplies a higher-level interface, simplifying the creation of statistically sound and visually interesting charts. Greatest suited to customers who prioritize ease of use and aesthetically pleasing output.
7. Greatest Practices for Efficient Bar Charts
- Clear and concise labels: Use descriptive labels for axes and titles.
- Applicable scaling: Select a scale that precisely represents the info with out distortion.
- Constant coloration scheme: Use a coloration scheme that’s each visually interesting and aids in information interpretation.
- Keep away from muddle: Hold the chart clear and uncluttered to stop visible overload.
- Think about context: The chart ought to be acceptable for the viewers and the message being conveyed.
By mastering the strategies and finest practices outlined on this article, you may leverage the facility of Python’s visualization libraries to create informative and visually compelling bar charts that successfully talk your information insights. Keep in mind to all the time prioritize readability, accuracy, and aesthetic enchantment to make sure your charts are each efficient and interesting.


Closure
Thus, we hope this text has offered priceless insights into Mastering Bar Charts in Python: A Complete Information. We admire your consideration to our article. See you in our subsequent article!